
- CircleCI
- Requirements:
- Automatically deploying Jekyll blog to GitHub Pages
- CircleCI Configuration
- Config.yml
- Deploy.sh script
- Let’s run our pipeline
- You must use Bundler 2 or greater with this lockfile error
- Testing in CI
- Summary
A few days ago I logged in to Google Webmaster Tools to check if my blog is already available on google. I was surprised because the site was blocked. The addresses in sitemap.xml pointed to localhost: 4000/page-address. It’s all because I was building a blog locally and pushing a ready, built version from _sites directory to GitHub repository. I thought I would automate the deployment process using one of the to Cl/CD - CircleCI
CircleCI
CircleCI provides very interesting (and free, which is important for me) service that allows you to utilize continuous integration in your development process. CircleCI seamlessly integrates with GitHub, GitLab, BitBucket so you can automate your build, test, and deploy pipeline. There are many other Continuous Integration tools available on a market (Travis CI, Go CD, GitLab CI) however, I liked CircleCi the most. I encourage you to read the documentation.
Requirements:
- Github account
- Repository with the Jekyll blog source code
- Blog template based on Jekyll
Automatically deploying Jekyll blog to GitHub Pages
Currently, I have one public repository to which I push the contents of the locally generated _site folder. I want to prepare:
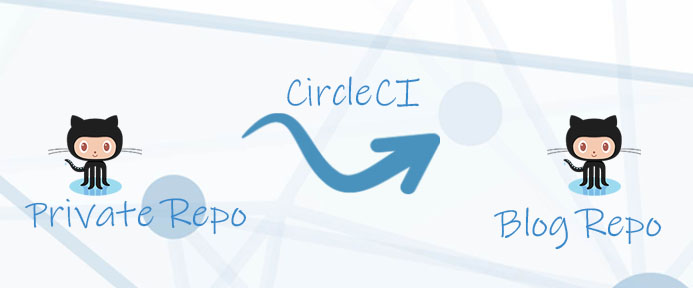
- A private repository with the entire Jekyll template code (I do not want to share my template code on the public repo)
- A public repository to which CircleCI pipeline will push the generated _site content
In my case, these two repositories are in different GitHub accounts. This is because I created a separate account for my blog. However, this does not matter when it comes to building automation.
CircleCI Configuration
First, log in to CircleCi using the Github account. If you have two accounts like me (One for the blog, the second for yourself) - use the second one. This is where we will store the entire Jekyll template code in the private repository.
After logging in you should see your repositories. Select the repository where you will store the entire template code. 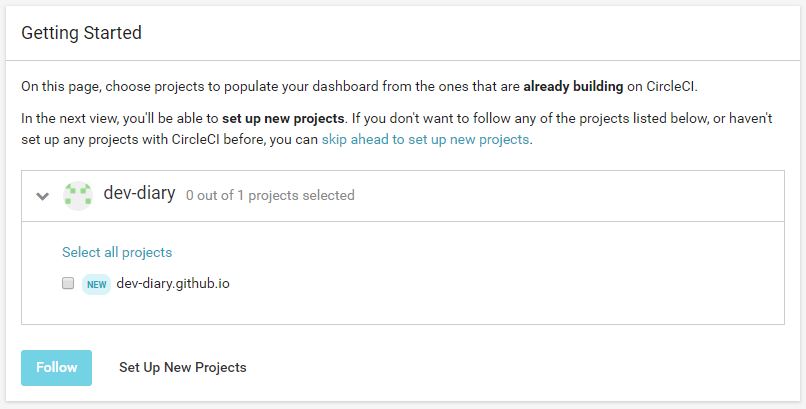
Now we have to define a deployment pipeline. CircleCI configuration is stored in a single YAML file located at .circleci/config.yml in the root of your project’s directory.
Config.yml
Detailed instructions on how to create configuration can be found on the https://circleci.com/docs/2.0/writing-yaml/. My configuration is simple and contains only a few steps:
defaults: &defaults
  working_directory: ~/repo
version: 2
jobs:
  build:
    <<: *defaults
  docker:
      - image: circleci/ruby:2.6
    environment:
    steps:
      - checkout
      - run:
          name: Bundler Install
          command: gem install bundler
      - run:
          name: Rsync Install
          command: sudo apt install rsync
      - run:
          name: Install Dependencies
          command: bundle install
      - run:
          name: Jekyll build
          command: bundle exec jekyll build
      - deploy:
          name: Deploy Blog to GitHub
          command: |
            if [ $CIRCLE_BRANCH == 'master' ]; then
              bash .circleci/deploy.sh
            fi
workflows:
  version: 2
  build:
    jobs:
      - build
I used a CircleCI pre-built docker image that comes with tools that are useful to build Jekyll theme (Ruby and Rails image). In my pipeline, I install the bundler, which is needed to install all of the dependencies specified in the Gemfile file. I build a template just like locally - using bundle exec Jekyll build. You probably wonder why I added the Rsync Install step. This is to synchronize the newly generated theme with the currently used. In Linux, you can not move files with overwriting, that’s why I’m using Rsync.
Deploy.sh script
# Clone Jekyll generated template repository
git clone https://<GitHub Personal access token>@github.com/dev-diary/dev-diary.github.io.git
cd dev-diary.github.io

# Adding only files that have changed to the currently used template
rsync -a ../_site/ .

#Setting GIT user
git config --global user.email "michael.fabjanski@gmail.com"
git config --global user.name "Michal"

# Preparation of backup branch name with (Branch from before new change)
BRANCH_NAME=backup-$(date -d "today" +"%Y%m%d%H%M")
git checkout -b $BRANCH_NAME
git push -q https://7d2c83a2ddc30630bb41d19177775e30c09d29b1@github.com/dev-diary/dev-diary.github.io.git $BRANCH_NAME

#Add new changes to the generated template code and push it
git checkout master
git add .
git commit -m "Builded new version - $(date -d "today" +"%Y%m%d%H%M")"
git push -q https://<GitHub Personal access token>@github.com/dev-diary/dev-diary.github.io.git
I clone the repository with the generated template. Then I only add new changes (generated by the pipeline in the _site folder). Because I use the second repository for the blog (it is not connected to CircleCi), I had to generate GitHub Personal access token.
Before the commit, I create a branch with back up.
In the end, I commit the changes and push to the repository with the generated theme.
Let’s run our pipeline
After adding my private repository with the entire template code in CircleCI - the tool automatically triggers builds after each commit. 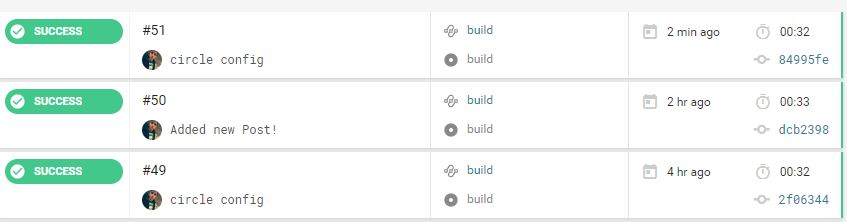
This is the sample build: 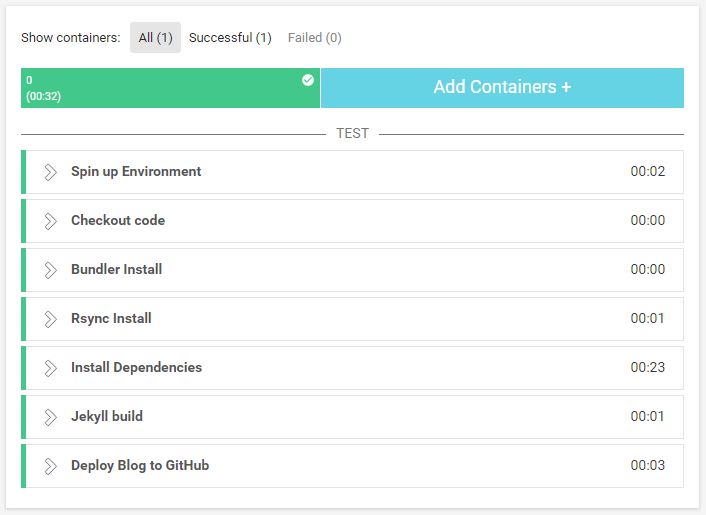
After each commit to the master in my private repository, after about 30 seconds, a new commit is added to the public blog repository. 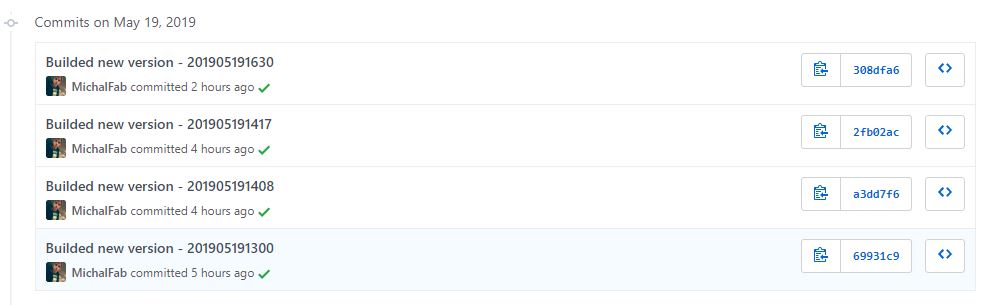
You must use Bundler 2 or greater with this lockfile error
If your build was a fail and you saw this message: warn_for_outdated_bundler_version': You must use Bundler 2 or greater with this lockfile - you have to add gem update --system step before installing bundler (See more on GitHub)
Testing in CI
It is good practice to automatically test new functionalities before deployment. You can use HTML Proofer - set of tests to validate HTML. It is required to add a dependency to the Gemfile: gem 'HTML-proofer' and one more step to circle.yml:
      - run:
          name: Run Tests
          command: bundle exec htmlproofer ./_site -check-html
Summary
It works! I have a private repository with the code of my template. I am the only one who has access to theme code. After each commit on the master branch - my template is automatically built and pushed to Github pages repository. Within a few seconds after pushing changes, the new version of the blog is available online.