
- Deploy Kubernetes Dashboard
- Proxy to host Windows
- Creating a service account and a role binding in Kubernetes
- Sign in to Kubernetes Dashboard
- Summary
In the previous post, we have prepared an environment for work and installed Kubernetes and Docker. Now, we will deploy Kubernetes Dashboard.
Deploy Kubernetes Dashboard
Kubernetes Dashboard is web-based UI for Kbuernetes clusters. It allows to manage applications deployed in the cluster. Dashboard documentation is available at Kubernetes Github repo. Use the following command to deploy the dashboard on the cluster:
kubectl apply -f kubectl apply -f https://raw.githubusercontent.com/kubernetes/dashboard/v1.10.1/src/deploy/recommended/kubernetes-dashboard.yamlTo access Dashboard from your Ubuntu you must create a secure channel to your Kubernetes cluster. Run the following command:
kubectl proxyNow check in the new Putty window if dashboard is properly exposed:
curl -I 127.0.0.1:8001You should see 200 OK Http response:
michal@michal:~$ curl -I 127.0.0.1:8001
HTTP/1.1 200 OK
Content-Length: 2738
Content-Type: application/json
Date: Sun, 14 Jul 2019 10:07:39 GMT
Proxy to host Windows
We will use the Windows browser to manage the cluster. To enable this run the following command in Ubuntu terminal:
kubectl proxy --address 192.168.0.129 --accept-hosts '^.*$' --port=8001And go to http://192.168.0.129:8001/api/v1/namespaces/kube-system/services/https:kubernetes-dashboard:/proxy/#!/login in your browser on windows. You should have seen the dashboard login screen. Please remember to change my inet IP adrress 192.168.0.129 with your VM’s inet IP address. 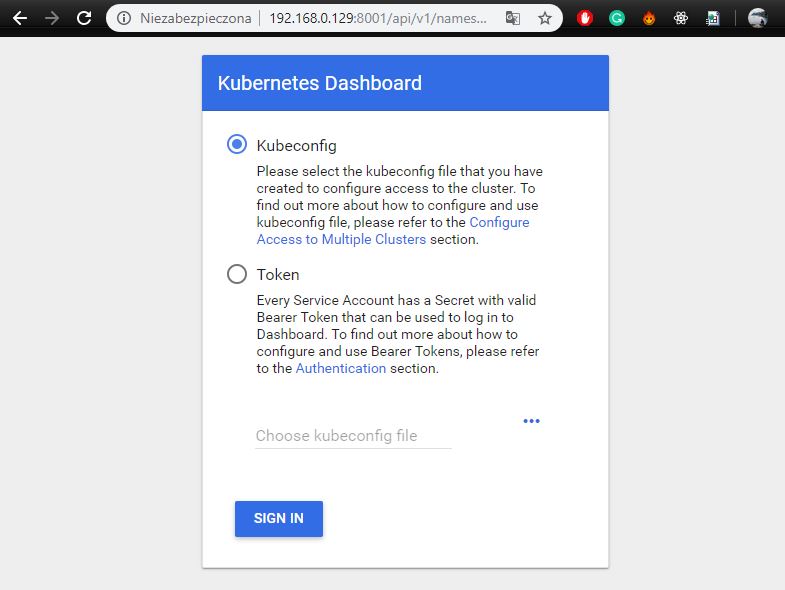
Creating a service account and a role binding in Kubernetes
To log in to our dashboard we need a service accout and a role binding. To create a service account, use the following command:
kubectl create serviceaccount --namespace kube-system admin-userAnd for role binding:
kubectl create clusterrolebinding admin-user --clusterrole=cluster-admin --serviceaccount=kube-system:admin-userSign in to Kubernetes Dashboard
There are several ways to log into the dashboard. We can genereate JWT token:
kubectl -n kube-system describe secret $(kubectl -n kube-system get secret | grep admin-user | awk '{print $1}')Copy generated token and use it when logging in to the dashboard: 
Unfortunately, dashboard is only available via localhost. We can not log into the dashboard from the host system (Windows):
Dashboard should not be exposed publicly using kubectl proxy command as it only allows HTTP connection. For domains other than localhost and 127.0.0.1 it will not be possible to sign in. Nothing will happen after clicking Sign in button on login page.
So, we can create SSH tunnel or enable skip loging. I chose the second option:
kubectl edit deployment/kubernetes-dashboard --namespace=kube-systemAdd --enable-skip-login to the deployment’s command line arguments:
      containers:
      - args:
        - --auto-generate-certificates
        - --enable-skip-login            # <-- add this line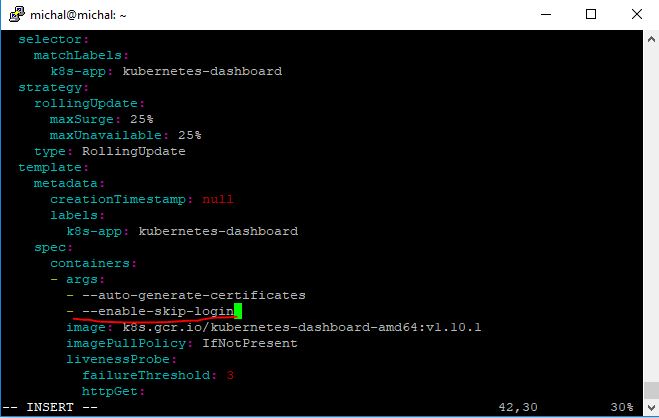
Now refresh the dashboard and click on the “skip” button. You will be correctly logged into the dashboard: 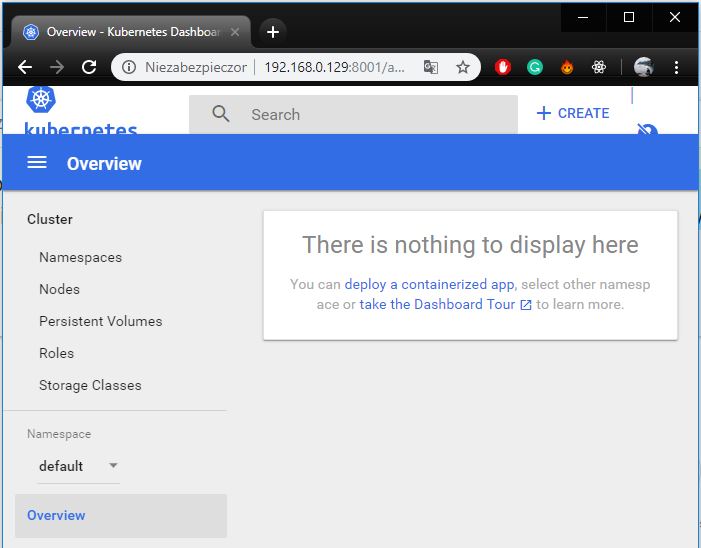
Summary
We have already configured a single node cluster and a dashboard thanks. Now you can manage your applications in Kubernetes. If you have any problems, I invite you to comment.