
Creational design patterns deal with object creation mechanisms, trying to create objects in a manner suitable to the situation. In this article, I will describe the most popular patterns in this category and how Spring uses them!
The Factory pattern
Spring, in itself, is already an example implementation of the Factory pattern. The pattern is used throughout the entire framework. One of the primary places it’s used is the BeanFactory class.
Intent
- Factory pattern allows construction of similar classes of different types using a factory method
- Method call creates the object for you
- Created objects are instances from classes that share an interface or subclass
Problem Solution
- Thanks to Factory Design Pattern you do not have to worry about class construction in more than one place.
- It allows you to leverage the interface for repetitive operations.
- Copy-paste bugs are less likely.
Structure of the Factory Pattern
Firstly, you have to create common interface that you are going to use in objects factory. Then, you need to create a class that creates instances of your inteface. In that class, you have to implement a method that servers concrete classes that you will then implement from the interface itself. So, again, we have a class that has a method that creates instances of the interface when under the coverage that it’s actually creating instances in the concrete class.
Abstract Factory Pattern
Abstract Factory Pattern is a pattern very similar to the Factory Pattern. You can say that it is Factory of factories. In a nutshell, there are two main differences between the Factory Pattern and Abstract Factory:
- Abstract Factory design pattern creates Factory
- Factory design pattern creates Products
public abstract class AbstractFactory {
    public abstract Product1Base CreateProduct1();
    public abstract Product2Base CreateProduct2();
}
class ConcreteFactory1 extends AbstractFactory{

    @Override
  public Product1Base CreateProduct1() {
        return new ConcreteProduct1();
    }

    @Override
  public Product2Base CreateProduct2() {
        return new ConcreteProduct2();
    }
}

class ConcreteFactory2 extends AbstractFactory{

    @Override
  public Product1Base CreateProduct1() {
        return new ConcreteAnotherProduct1();
    }

    @Override
  public Product2Base CreateProduct2() {
        return new ConcreteAnotherProduct2();
    }
}
The AbstractFactory class is responsible for creating several different types (in contrast to Factory Pattern). As you can see in the above example, each of the factories can be associated with different objects within the same group (in this case - products).
Factory Pattern implementation in Spring
Let`s take a look at above interface:
  public interface Animal {
    void setName(String name);
    String getName();
    String getType();
    void makeASound();
}
Animal interface has several methods that are common to all animals (each animal has a type and name). So, now you need to create a new class: AnimalFactory
@Component
public class AnimalFactory {
    public Animal createAnimal(String type) {
        switch (type) {
            case "bird":
                return new Bird();
            case "cat":
                return new Cat();
            default:
                throw new UnsupportedOperationException("Unsupported animal type!");
        }

    }
}
I added @Component annotation because I want the Spring to manage this factory. There is one method (factory method) which returns an Animal - createAnimal. It is a very simple factory that supports only two types of animals (cat, bird). If another type is provided, an exception will be thrown.
Let’s create Spring controller - FactoryController:
@RestController
@RequestMapping("/")
public class FactoryController {

    private AnimalFactory factory;

    @Autowired
  public FactoryController(AnimalFactory factory) {
        this.factory = factory;
    }

    @PostMapping("addAminal/{type}/{name}")
    public Animal addAnimal(@PathVariable String type, @PathVariable String name) {
        Animal animal = this.factory.createAnimal(type);
        animal.setName(name);
        animal.makeASound();
        return animal;
    }
}
I added one @PostMapping method, which we will pass through the @PathVariable type and name of the animal. In response, we will get the new animal object created by the factory. Let’s test it using a postman:  Application logs:
As you can see, we have just created a new object - a bird using our factory.
Factory Pattern popular use cases in Spring Framework
The Spring framework uses the factory design pattern for the creation of the objects by using two approaches:
- Spring BeanFactory Container (e.g
org.springframework.beans.factory.BeanFactory) - It is the simplest container in the Spring framework which provides the basic support for DI - Spring ApplicationContext Container (e.g
[org.springframework.context.ApplicationContext]) - t is another container present in spring container which adds extra enterprise-specific functionality such as publishing application events to the attentive event listeners or loading messages from a properties file.
As you can see, entire Spring is already an example implementation of the Factory pattern (any Spring application’s application context is just a giant Factory)
The Builder pattern
Another common creational pattern is the Builder pattern. The popular use of Builder in the Spring is ResultAction. This class is part of the MockMcv - used for testing web applications.
Intent
- Each method return the object reference it`s called from.
- There is
build()method which returns a fully contstructed object (based on all the intermediate calls).
Problem Solution
- Improves the readability of the code when object creation has many parameters.
- Useful when some or all paramaters are optional.
Structure of the Builder Pattern
Firstly, you need to define a base class with all args constructor. Then, you have to create a Builder class with attributes and setters for each argument of the base class. Each setter should return the builder. Then, need to create a build() methid that will construct and return object of base class.
Builder Pattern implementation in Spring
I started my implementation with a simple Java class - Employee.java:
public class Employee {
    private String firstName;
    private String lastName;
    private String employeeId;
    private String email;

    public Employee(String firstName, String lastName, String employeeId, String email) {
        this.firstName = firstName;
        this.lastName = lastName;
        this.employeeId = employeeId;
        this.email = email;
    }

    public Employee() {
    }

    public String getFirstName() {
        return firstName;
    }

    public String getLastName() {
        return lastName;
    }

    public String getEmployeeId() {
        return employeeId;
    }

    public String getEmail() {
        return email;
    }
}
There are a couple attributes, contructor and auto-generated getters. It’s time for implementing builder pattern! To do this, create the EmployeeBuilder class with the same fields as the Employee class. Generate setters - one for each of our fields. If you generate setters by IDE, you must remember to change the type returned by setter (void) to EmployeeBuilder.
public class EmployeeBuilder {
    private String firstName;
    private String lastName;
    private String employeeId;
    private String email;

    // Each setter returns EmployeBuilder object.
  public EmployeeBuilder setFirstName(String firstName) {
        this.firstName = firstName;
        return this;
    }

    public EmployeeBuilder setLastName(String lastName) {
        this.lastName = lastName;
        return this;
    }

    public EmployeeBuilder setEmployeeId(String employeeId) {
        this.employeeId = employeeId;
        return this;
    }

    public EmployeeBuilder setEmail(String email) {
        this.email = email;
        return this;
    }

    public Employee buildEmployee() {
        return new Employee(firstName,lastName, employeeId, email);
    }
}
At the end I use the public Employee buildEmployee() method that creates the employee. The advantage of this solution is that if any of our fields are null, null will be populated. We don’t really have to think about where the nulls go. Let’s take a look at action. I created BuilderController Spring controller which has two endpoints. The first creates an employee with all fields, the second creates an employee without an email:
@RestController
@RequestMapping("/builder")
public class BuilderController {

    @GetMapping("employee1")
    public Employee getEmployee1() {
        return new EmployeeBuilder()
                .setEmployeeId("1234")
                .setEmail("test@test.com")
                .setFirstName("John")
                .setLastName("smith")
                .buildEmployee();
    }

    @GetMapping("employee2")
    public Employee getEmployee2() {
        return new EmployeeBuilder()
                .setEmployeeId("4321")
                .setFirstName("Jeff")
                .setLastName("Freeman")
                .buildEmployee();
    }
}
As you probably expect, the GET request on the first edpoint returns: 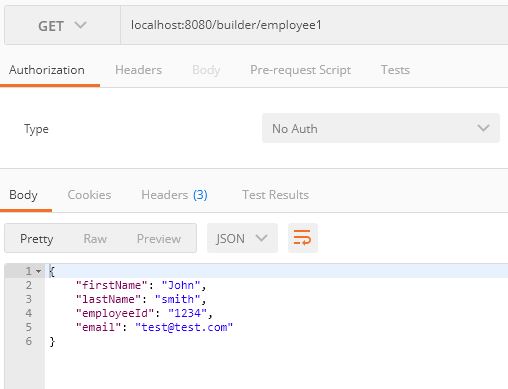
The second endpoint returns the employee with a null as an email: 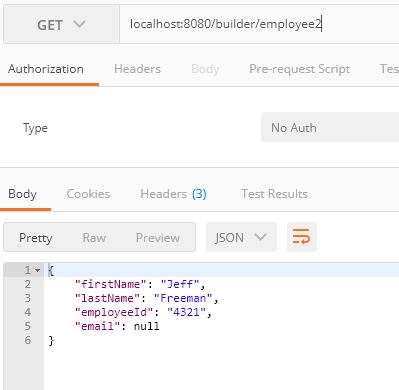
The Singleton pattern
Singleton is a pattern used by every Java developer who uses Spring. Every bean is by default a singleton. Its purpose is to provide the possibility of creating only one object of a given class and providing global access to it.
Intent
- There is an only private constructor.
- Class stores reference to the instance of itself.
- There is getInstance() method which returns a reference of singleton class instance or constructs new object if not constructed.
In Singleton pattern, Java new Class is never called on the class except getInstance case. You should wrap this method with some locking functionality to ensure multi-thread safety.
Problem Solution
Singleton can be used in cases:
- Object creation is expensive.
- The class that stores the application configuration. From anywhere in the system, we can modify it and we want the changes to be visible from anywhere. At the same time, we can not allow different versions of configurations to be maintained in the system.
- You need to store static state for multiple parts of the application.
- You need to control who has access to an object (concurrency controlling).
Structure of the Singleton Pattern
There are many ways to implement a singleton, but all can be reduced to three main points:
- First you have to create a private constructor in your Singleton class
- Then, create an instance handle which is stored in the class
- Create static
getInstance()method that uses a synchronized block on the object to reduce the thread safety risk.
Singleton Pattern exemplary implementation in Spring
In the following example, we will implement our own Singleton. Then we will prove that the Spring components are singletons by default. Let’s start with creating a couple of classes. The first one we are going to create is Singleton.java class which will be a traditional singleton (described in the previous point):
public class Singleton {
    private static Singleton instance;

    private Singleton(){}

    public static Singleton getInstance() {
        if(null == instance){
            synchronized (Singleton.class){
                if(null==instance) {
                    instance = new Singleton();
                }
            }
        }
        return instance;
    }
}
Now, create simple Spring @Component class without any logic:
@Component
public class SpringSingleton {
}
Next, let’s test whether our singletons ensure that only one object is created. I used the JUnit test (generated automatically when creating a Spring Boot project in Spring Initializer):
@RunWith(SpringRunner.class)
@SpringBootTest
public class SpringDesignPatternsApplicationTests {

    @Autowired
  SpringSingleton springSingleton1;

    @Autowired
  SpringSingleton springSingleton2;

    @Test
  public void singletonObjectsShouldBeEquals() {

        Singleton singleton1 = Singleton.getInstance();
        Singleton singleton2 = Singleton.getInstance();

//      Checking if the Singleton objects are definitely one, the same object
  Assert.assertSame(singleton1, singleton2);

//      Checking if the spring components are definitely singletons
  Assert.assertSame(springSingleton1, springSingleton2);
    }
}
assertSame() method checks if arguments are same objects. Test result: passed - everything was the same. That`s how you can write traditional singletons or singletons in Spring.
Singleton Pattern vs Spring Singletons
There is one more thing you should know. As I wrote - all Spring beans are singletons by default. However, these are not the same singletons as the traditional singletons. The traditional Singleton pattern assumes that there is only one instance of a given class at the space managed by Java classloader. In Spring, there is only one instance of Bean for each given context (_org.springframework.context.ApplicationContext) instance. So, if you have more then one context, all managed by the same Java classloader, you will probably have more than one instance of a bean.
The Prototype pattern
The prototype is a pattern whose purpose is to copy objects from the parent object. In the prototype pattern, a new object is created by cloning an existing object. In Java, the clone() method is an implementation of this design pattern.
Intent
- Instance is cloned at runtime to give new instances that have the same state
- In Java It’s done with the
Cloneableinterface/
Problem Solution
The prototype can be used in cases:
- You have to create a lot of instances of the same or similar objects, and cloning is more efficient than creating instances of objects with the new Java keyword.
- Useful with objects that must be thread safe and need to store state (e.g shopping carts - where you want to have the same behavior but the individual items in the cart are different)
Structure of the Prototype Pattern
- Create an abstract base class that implements Cloneable.
- Extend abstract class in prototype instances.
- Override the
clone()method in those prototype instances - add the class specific behavior.
PrototypePattern implementation in Spring
I will not implement the traditional Java prototype. However, I will show you how to create a prototype bean in Spring. I created one dumb class: SpringPrototype.java
public class SpringPrototype {
}
In the main application class in Spring, I defined defined a new prototype bean by setting @Scope to prototype:
@Bean
@Scope("prototype")
public SpringPrototype prototype(){
    return new SpringPrototype();
}
JUnit test:
@Autowired
SpringPrototype prototype1;

@Autowired
SpringPrototype prototype2;

@Test
public void prototypeObjectsShouldNotBeEquals() {
    Assert.assertNotSame(prototype1, prototype2);
}
I injected two instances of the SpringPrototype class with @Autowired. Just like in the Singleton example - I used the static method from Assert to check that the created instances are not the same. My test is green. It’s proof that there are two different instances of the same object.
Conclusion
I hope you liked the post. We’ve got to know the most important creational patterns used in Spring. In the next post, we will learn about structural patterns in Spring Framework!
The source code from the post is available on my Github repo.